When to Replace a Waterpik™ Water Flosser Reservoir Valve
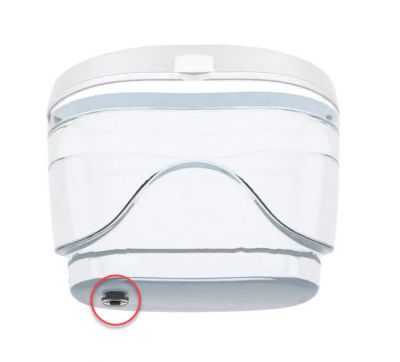
Some countertop WATERPIK water flosser models use a black valve in the bottom of the reservoir.
The valve is designed to prevent water from dripping out of the reservoir, but still allow it to flow when water flossing.
Over time, this valve may need to be cleaned or replaced. The information below provides details.
If the Reservoir Leaks from the Valve
Note: Water flosser products are not intended to store liquid between uses - be sure to empty your product after each use.
Symptom
Water drips from the bottom of the reservoir valve
Solution
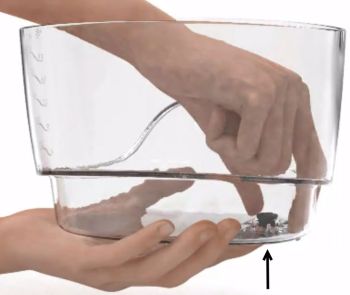
Clean and reshape the reservoir valve:
- Remove valve from reservoir by pushing it out from the bottom
- Hold reservoir valve under warm running water
- Massage valve between index finger and thumb for 30-40 seconds
- Reinstall the valve, ensuring the dome side is facing up and the four-prong side is showing on the bottom
- Fill the reservoir with water and check for leaks
- If the valve continues to leak or breaks down while you are cleaning it, purchase a replacement:
If the Water Flosser Experiences Pressure Loss
Symptom
Water pressure drops significantly, even at pressure high settings
Solutions
- Try a different water flosser tip
- Clean unit and handle (see our How to Clean a Waterpik™ Water Flosser article)
- If unit has a pause button, fully depress and release the button
- If you add mouthwash to your water reservoir, follow our mouthwash use instructions
If pressure is still low:
- Remove valve
- Set empty reservoir on base of unit
- Fill reservoir with water without removing it from the base
- Turn unit on and test pressure
- If pressure is restored with the valve removed, replace the reservoir valve: